Tuesday, July 24, 2012

Peach Pie


Schools out, the sun is shining, and the livin is eassyy. Summer is a sign of lazy days and experiments in the kitchen. And the peaches at the grocery store were calling my name, begging me to slice them up and put them in a warm pie.
When life gives you peaches, obviously you have to spend half the day creating a crisp and buttery peach pie!

Peach pie is sweet and pretty, like wearing a flowy dress and sitting outside sipping iced tea on a sunny day. It's like a slice of summertime, best eaten with a big scoop of vanilla ice cream to cool ya down. Absolutely necessary for days so hot, you sweat in the creases behind your knees (oh is that just me? okay, weird.)

This pie is simple and wonderful. Just dough, fresh peaches, and some sugar and you've got yourself a delightful dessert that will bring back all the childhood memories during the summer when simple joys like a slice of pie made you the happiest kid in the world.

This pie makes me the happiest kid in the world. Fruit pies are the key to my happiness. I will always love the combination of fruit and buttery pastry. Always always.

Get yourself some dang peaches and get into the spirit of summer!

 Pie Dough for Lattice-Top Pie

From: Baking Illustrated Cookbook

Ingredients:

3 cups all purpose flour, plus more for dusting the work surface
1 teaspoon salt
2 tablespoons sugar
7 tablespoons vegetable shortening, chilled
10 tablespoons cold unsalted butter, cut into
10 tablespoons ice water

Directions: 

 Process the flour, salt, and sugar in food processor until combined. Add the shortening and process until the mixture has the texture of coarse sand, about 10 seconds. Scatter the butter pieces over the flour mixture; cut the butter into the flour until the flour until the mixture is pale yellow and resembles coarse crumbs, with butter bits no larger than small peas, about ten 1-second pulses. Turn the mixture into a medium bowl.

Sprinkle 10 tablespoons of the ice water over the mixture. With rubber spatula (or fingers!) use a folding motion to mix. Press down on the dough with the broad side of the spatula until the dough sticks together, adding an extra tablespoon of water if the dough will not come together. Divide the dough into 2 pieces, one slightly larger than the other. (If possible weigh the pieces; they should weigh 16 ounces and 14 ounces.) Flatten the larger piece into a rough 5-inch square and the smaller piece into the 4-inch disk; wrap separately in plastic and refrigerate at least 1 hour, or up to 2 days, before rolling.

 Lattice-Top Peach Pie

From: Baking Illustrated Cookbook

Ingredients:

1 recipe Pie Dough for Lattice-Top Pie
Flour for dusting the work surface
6-7 ripe, medium-sized peaches (about 7 cups when sliced)
1 tablespoon lemon juice
1 cup (7 ounces) plus 1 tablespoon sugar
Pinch ground cinnamon
Pinch ground nutmeg
Pinch salt
3-5 tablespoons potato starch or Minute tapioca*

*I was not able to find either of these so I used cornstarch, which the book does not recommend, but it was the best I could do!

Directions:

 Remove the dough from the refrigerator (if refrigerated longer than 1 hour, let stand at room temperature until malleable). Roll the larger piece of dough to a 15 by 11-inch rectangle, about ⅛ inch thick; transfer the dough rectangle to a baking sheet lined with parchment paper. With a pizza wheel or paring knife, trim the long sides of the rectangle to make them straight, then cut the rectangle lengthwise into 8 strips, 15 inches long by 1 inch wide. Freeze strips on a baking sheet until firm, about 30 minutes.

 Roll the smaller piece of dough on a lightly floured surface or between 2 pieces of parchment paper to a 12-inch circle. It's okay if it's not perfect. No one's perfect. Pie crust with imperfections is homey and authentic. It has character!


Transfer the dough to a 9-inch pie plate. Ease the dough into the pan corners by gently lifting the edge of the dough with one hand while pressing into the pan bottom with the other hand. Leave the dough that overhangs the lip of the pie plate in place; refrigerate the dough-lined pie plate.


3. Remove the dough strips from the freezer; if they are too stiff to be workable, let them stand at room temperature until malleable and softened slightly but still very cold.

To make a lattice top:

Lay out 4 strips of dough on parchment paper. Fold the first and third strips back, then place a long strip of dough slightly to the right of the center.


Unfold the first and third strips over the perpendicular strip and fold the second and fourth strips back. Add a second perpendicular strip. Now unfold the second and fourth strip.

Repeat this process with 2 more perpendicular strips (you will have a total of 8 strips of dough, 4 running in each direction). 


Freeze the finished lattice until very firm, about 15 minutes, and then slide it over the filling.
 Trim off the excess lattice ends, fold the rim of the shell up over the lattice strips and crimp


 Meanwhile, adjust an oven rack to the lowest position, place a rimmed baking sheet on it, and heat the oven to 500 degrees. Bring 3 quarts water to a boil in a large saucepan and fill large bowl with 2 quarts cold water and 2 trays ice cubes. 

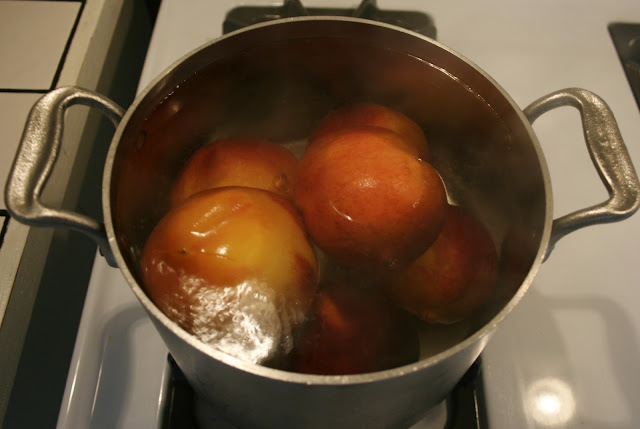
With a paring knife, score a small x at the base of each peach. Lower the peaches into a pan of boiling water with a slotted spoon. Turn the peaches occasionally and simmer until their skins loosen, 30 seconds to 1 minute, depending on the ripeness of the peaches.  Not too long though! The peaches will get smooshy.

 
Transfer the peaches to a bowl of ice water. Let stand to stop the cooking process, about 1 minute and cool. Starting from the scored x, peel each peach. Use a paring knife to lift the skin from the flesh and pull the skin off. Peel the peaches. Halve, pit, and cut each peeled peach into ⅜ inch slices.

Toss the peach slices, lemon juice, 1 cup sugar, cinnamon, nutmeg, salt, and potato starch (corn starch) in a medium bowl.

Turn the peach mixture into the dough-lined pie plate. 

Remove the lattice from the freezer and place on top of the filled pie. Trim the lattice strips and crimp the pie edges. Lightly brush or spray the lattice top with 1 tablespoon water and sprinkle with 1 tablespoon sugar.


 Lower the oven temperature to 425 degrees. Place the pie on the baking sheet and bake until the crust is set and begins to brown, 25 to 30 minutes. Rotate the pie and reduce the oven temperature to 375 degrees; continue baking until the crust is deep golden brown and juices, 25 to 30 minutes longer. Cool the pie on a wire rack for at least 2 hours before serving. 
The pie will bubble and overflow, but that's okay because it's juicy and delicious and worth the mess.

Set on a pretty tablecloth to cool, and then enjoy with family or friends :)


Oh! And you can make something totes adorable with the leftover dough!


Tuesday, July 17, 2012

Chocolate Orange Pound Cake


Pound cake. Ohhhh pound cake.
Pound cake is a source of happiness, in warm moist sweet loaf form.
And sometimes its necessary to eat half the loaf.
It's okay. Pound cake feeds the soul.

This pound cake pairs two flavors of orange and chocolate. I absolutely love orange and chocolate together, especially in a rich cake. It's tangy, but sweet...whatwhat!

Soo although this cake was extremely delicious and wonderful, it was a mini disaster in my kitchen. This recipe is wayyyy too big for a 9 by 5 inch loaf pan like the original recipe stated. I repeat: Way. Too. Big.
The batter was constantly overflowing over the sides of the pan, forcing me to scrape up the drippings and eat all of them. It was rough, but I managed to pull through.

I recommend making this in a bundt pan....
Whoa, my spell check says bundt is not a word. This is a disgrace. This is mutiny! This must be changed!
Totally off topic.

Anyways it took about 90 minutes to cook this baby, because the middle was completely raw while the edges were brown. It was a fiasco! This bread was a trouble maker indeed. A scrumptious trouble maker.

Chocolate Orange Pound Cake

from: Joy the Baker

Ingredients:

2 cups all-purpose flour
1 1/2 teaspoons baking powder
1/2 teaspoon salt
1 1/2 cups granulated sugar
2 tablespoons orange zest
1 (8 ounce) package cream cheese, softened
3/4 cup (1 1/2 sticks) unsalted butter, at room temperature
4 large eggs
2 teaspoons vanilla extract
1 cup dark chocolate pieces

 Directions:

Place a rack in the center of the oven and preheat to 325 degrees F.  Grease a 9×5-inch baking pan and dust with flour. STOP. NO. BUNDT PAN. NOW. Set aside.

In a medium bowl, whisk together flour, baking powder, and salt.  Set aside.

On a clean cutting board or counter, place the granulated sugar.  Add the orange zest.  With a bench scraper or the back of the spoon, work the zest into the granulated sugar, creating a fragrant and orange flavored sugar.  Set aside.


Sugar studded with orange zest. Orange sugar. Sugar and orange. So tangy, so sweet, SO right.

In the bowl of an electric stand mixer fitted with a paddle attachment, cream together softened butter and cream cheese.  Stop the mixer occasionally to scrape down the bowl and make sure that the butter and cream cheese are evenly mixed.  Add the citrus zest to the butter and cream cheese mixture, and beat on medium speed until smooth and creamy, about 3 minutes.

Stop the mixer.  Scrape down the sides of the bowl.  On medium speed, beat in one egg at a time, beating for one minute after each addition.  Stop the mixer and scrape down the sides of the bowl as necessary.  Beat in vanilla extract.

Add dry ingredients all at once.  Beat on low speed until dry ingredients are completely incorporated.

Fold in the chocolate pieces.
Eat raw batter.

Spoon batter into prepared pan. This is when I should have noticed a BIG problem. But I didn't. I just threw it into the oven, blissfully unaware of the chaos that was about to ensue.


  Bake until a skewer inserted in the center comes out clean, or with just a few crumbs. Mine took about an hour and a half, plus a few extra 5 minutes to make sure the middle was done. I checked it about every 10 minutes because it kept overflowing.

 You might consider loosely placing a foil tent over the cake after about 45 minutes of baking.  This will keep it from browning too much, and help the center bake up.


 Although this cake was a hassle, it was absolutely worth it. It was orangy and sweet and decadent. I highly recommend this cake. On any and every day.

Tuesday, July 10, 2012

Grilled Caribbean Chicken Kebabs with Black Bean and Mango Salsa


Hello! Summer is the best time for grilling, so why not break out the ol' gas griller and get cookin! That's what I thought this evening and kebabs are perfect for a summer time meal.

I love the way the spiced grilled chicken tastes with the tangy black bean and mango salsa. It makes for a very flavorful and colorful dish.

The kebabs were deeply appreciated by a very hungry crowd, who gobbled them up in no time.

Just keep in mind that the chicken needs to marinate for at least and hour. Let all those good spices soak all up in that chicken, ya gotta be patient for that yummy flavor.


 And the mango salsa also must sit in the fridge for an hour to absorb the flavors....as usual I did not read the recipe all the way through and ended up not cooking til late, but oh well it was still delicious!


Grilled Caribbean Chicken Kebabs with Black Bean Salsa

from: Cooks Illustrated The Best Chicken Recipes cookbook

Ingredients: 

Chicken and Marinde:
½ cup extra virgin olive oil

¼ cup minced fresh parsley leaves
3 medium garlic cloves, minced
1 ½ teaspoons grated zest, plus 2 tablespoons juice from 1 lime
1 teaspoon ground cumin
1 teaspoon chili powder
½ teaspoon ground allspice

¼ teaspoon ground cinnamon
1 teaspoon salt
½ teaspoon ground black pepper
2 pounds boneless, skinless chicken thighs, trimmed and cut into 1 inch chunks

Vegetables:
3 large onions, cut into ½ inch-thick wedges
2 tablespoons extra virgin olive oil
½ teaspoon salt

¼ teaspoon ground black pepper
1 recipe Black Bean and Mango Salsa

Directions:

For the Chicken and Marinade:
Whisk the olive oil, parsley, garlic, lime zest, cumin, chili powder, allspice, cinnamon, salt, and pepper together in a medium bowl. Transfer ¼ cup of the marinade to an airtight container, stir in the lime juice, and set aside. Add the remaining marinade to a large ziplock bag along with the chicken. Seal, shut, toss to coat, and refrigerate for at least 3 hours and up to 24 hours (I only refrigerated for 45 minutes and mine turned out just fine. But if you marinate the chicken for more than 3 hours, refrigerate the reserved marinade until you are ready to cook the chicken; bring to room temperature before using.)

Turn on all burners on the grill to high, close the lid, and heat the grill until very hot, about 15 minutes. Use a grill brush to scrape the cooking grate clean. Dip a wad of paper towels in oil, holding the wad with tongs, oil the cooking grate.

For the Vegetables:
Meanwhile, toss the onions with olive oil, salt, and pepper; set aside.

Remove the chicken chunks from the ziplock bag, allowing the excess marinade to drip off. Using eight 12-inch skewers, thread each skewer with 1 wedge of onion and 1 cube of chicken. Repeat this sequence 4 more times on each skewer. 

Grill the kebabs, uncovered, turning each kebab one-quarter turn every 2 minutes, until the chicken and onions are lightly browned and the meat is fully cooked, 8 to 10 minutes. Transfer the kebabs to a platter, pour the reserved marinade-lime juice mixture over the top and let rest for 5 to 10 minutes before serving with Black Bean and Mango Salsa.


Black Bean and Mango Salsa:


Ingredients:

1 medium mango, peeled, pitted, and cut into ¼ inch dice 
½ cup cooked black beans
¼ red bell pepper, stemmed, seeded, and chopped small
¼ green bell pepper, stemmed, seeded, and chopped small
¼ medium red onion, chopped small
6 tablespoons pineapple juice
¼ cup juice from 2 limes
¼ cup minced fresh cilantro leaves
1 tablespoon ground cumin
½ jalapeno chile, seeds and ribs removed, chile minced
salt and ground black pepper

Directions:

Mix all ingredients, including salt and pepper to taste, together in a medium bowl. Transfer to an airtight container and refrigerate to blend the flavors for at least 1 hour and up to 4 days.


Friday, July 6, 2012

Lemon Poppy Seed Blueberry Muffins


Nothing says "Good Morning Friend!" like a fresh batch of blueberry muffins. And these are not your average blueberry muffins. These are lemon poppy seed blueberry muffins. Woah. We're takin it to the next level here.

These muffins are comforting and warm, like a hug from your mother. 
They even have a crumb topping. As if it couldn't get any better...it did!

These are so moist and heavenly and have such a beautiful flavor. They're perfect for a morning pick-me-up. They are wonderful served warm with a glass of milk, which is how I enjoyed mine this morning, and that was when I knew that it was going to be a good day.


Lemon Poppy Seed Blueberry Muffins

from: Joy the Baker 

Ingredients:

 For the Muffins:
7 tablespoons unsalted butter
1/3 cup whole milk
1 large egg
1 large egg yolk
1 teaspoon pure vanilla extract
1 1/2 cups all-purpose flour
3/4 cup granulated sugar
1 1/2 teaspoons baking powder
3/4 teaspoon salt
1 tablespoon lemon zest
1 tablespoon poppy seeds
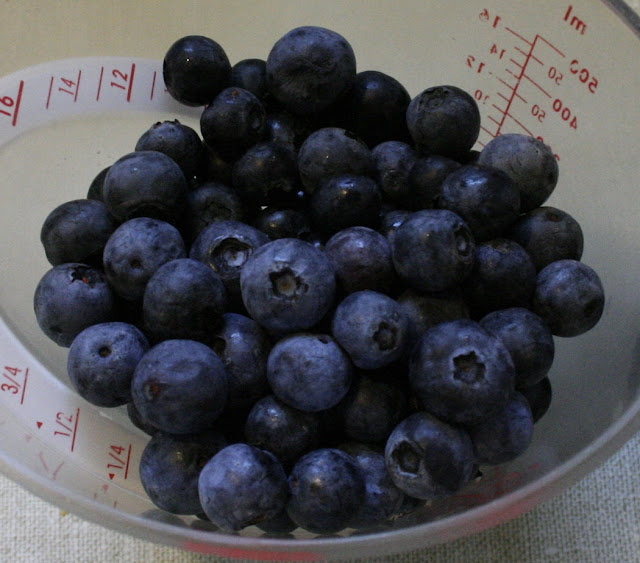
1 1/2 cups fresh blueberries

For the Topping:
3 tablespoons unsalted butter
1/2 cup all-purpose flour
3 tablespoons granulated sugar

Directions:

Place a rack in the upper third of the oven and preheat oven to 375 degrees F.  Line a muffins pan with paper or foil liners, set aside.

To make the muffins:  Melt butter in a small saucepan over medium heat.  Keep an eye on the butter.  It will melt, froth, and begin to crackle.  That’s the water cooking out of the butter.  The crackling will subside and butter will begin to brown fairly quickly.  Remove from heat when butter solids become a medium brown color and butter smells slightly nutty.  Immediately pour hot butter into a small bowl, or the butter will continue to cook in the hot pan.  Allow to cool slightly.

In a medium bowl, whisk together milk, egg, yolk, and vanilla until combined.  Add browned butter and whisk to combine.
Whisk together flour, sugar, baking powder, and salt in a medium bowl.  Add milk mixture all at once to the flour mixture and stir gently to combine.  Gently but thoroughly fold in the lemon zest, poppy seeds, and blueberries. 

 The batter was a little thick for usual muffins...but these suckers are anything but usual! They bake up like mini cakes.

Divide batter among prepared muffin cups.
To make the topping: Combine all ingredients in a bowl and rub together with clean fingertips until crumbly.  Sprinkle topping evenly over the muffin batter in cups.

Bake muffins 18 to 20 minutes until golden and crisp and a skewer inserted into the center of a muffin comes out clean.  Cool muffins in the pan for 15 minutes before removing.  Serve warm or at room temperature.

Muffins will last, at room temperature in an airtight container, for up to 3 days.  


 There was about a 2 second time frame between these two pictures. There must be a hungry mouse in the kitchen....or just a hungry big sister :)


I hope you will whip up these muffins and turn an average morning into something special. Trust me, it will make things a little brighter :)


Thursday, July 5, 2012

Sweet Sweet Freedom

Happy Independence Day!

The fourth of July is such a wonderful summer holiday. Outdoor cooking, friends and family, and beautiful explosions in the sky! woot!
What better way to celebrate 'Merica than with 40 pounds of shrimp boil and a table full of desserts! Mmmhhm.
Now thank your founding fathers for that piece of pie, you whippersnapper.

Oh and we got some beautiful weather in the middle of the day! Every year, without fail, it manages to rain on the fourth of July, even if for only a few minutes. It's like it's mother nature's way of throwing a little something back at us for all the fireworks we launch at her. Hmm..


While my dad had the massive shrimp boil covered, I was in charge of desserts (as usual).
This year I wanted a big variety in desserts and I knew I was feeding a lot of people so that's why I ended up making three different things. And plus I just wanted an excuse to bake like a fool.


The first lil lady in the trio of patriotic desserts was strawberry ice cream. I'm a novice to ice cream-making so this was a new experience for me. For how much I love ice cream, it really is a shame that I don't make it that often. That will change asap, people. So I dusted off the old ice cream maker and GOT DOWN TO BUSINESS.

This ice cream is super special because the strawberries get roasted for over an hour and soak up honey and balsamic vinegar in the oven, and an intense flavor-absorption takes place. It's magical.

I know you're probably thinking.."whoah wait a second...vinegar in my ice cream!? that is wiggity whack, bro." Believe me I thought the same thing at first, and I was really hesitant to pour the 2 tablespoons of balsamic onto the sweet strawberries..but oh boy am I glad I did. The harsh vinegar flavor really cooks down and the strawberries absorb it and it only intensifies the strawberry flavor. So all you taste is downright pure strawberry flavor...just intense and in your face delicious. So please please pour that vinegar on, my friend. It may sound wrong, but it is SO right.

Also: a special thanks to Dad for helping out with this one. You are the ice cream master!

Roasted Strawberry Ice Cream

 from: uTry.it

Ingredients:

2 pounds fresh strawberries, washed, padded dry and hulled
1/4 cup honey
2 tablespoons aged balsamic vinegar
1 cup whole milk
A pinch of salt
3/4 cup sugar
1 vanilla bean, split lengthwise
2 cups heavy cream
5 large egg yolks
1 teaspoon pure vanilla extract
1 tablespoon liqueur (I used orange flavored, but any will do)

Directions:

Preheat Oven to 300°F, place strawberries in a large glass or ceramic baking dish in a single layer.  Gently toss in honey and balsamic to coat.   Stir with a wooden spoon once or twice during roasting.  Roast until the strawberries turn into a deep red color and the syrup has thicken, about 90 minutes.  Let cool completely, cover and refrigerate until ready to use.


In a medium sauce pan, heat the milk, salt, and sugar on low heat until simmer.  With a paring knife, scrape the seeds from the vanilla bean into the milk along with the bean pod. Cover, remove from heat, and let the mixture infuse for one hour.

In a separate bowl, whisk together the egg yolks. Rewarm the milk mixture to a simmer.  While constantly whisking, gradually pour the milk mixture into the yolks. Scrape the warmed yolks mixture back into the saucepan.

Continue to cook the mixture over low heat and stirring constantly with a flat bottom wooden spatula.  Cook until the custard thickens and able to coat the spatula.

Place the cream in a large mixing bowl with a strainer on top.  Strain the custard into the heavy cream.  Stir in vanilla extract and raspberry liqueur, and refrigerate to chill thoroughly. Preferably overnight.

When ready to make the ice cream, remove the vanilla bean pod from the custard. Divide roasted strawberries in half, place one portion in the food processor and pulse until mushy and lumpy, just a couple pulses. Incorporate into the custard with a spatula. Then place the remaining portion in the food processor and pulse just enough to cut the berries, leaving larger chunks for the ice cream, even fewer pulses than before. Mix into the custard as well. Place mixture into ice cream maker.
Churn the custard in your ice cream maker according to the manufacturer’s instructions.

Mmm..look at that chunky glob of strawberry goodness. Something amazing is about to happen here.

 YES. So creamy and delicious!

A sad sight.


The second guest at the party was of course the traditional apple pie.
And of course, who else would have the BEST apple pie recipe I've made but the one and only Joy the Baker.

What makes this pie the best is definitely the buttery, flakey, perfect crust. It's made with butter and buttermilk... and will give you a big butt if you eat too much. Hah just kidding. (but not really).

Apple pie may be traditional, but it will always warm your heart's little nooks and crannies with love. This pie will feed your soul. This pie will make you a better person. 

I'll admit that the recipe is a little finiky and involved, but it is so worth it in the end. You worked hard for that pie, so now you get to eat at least half of it. Back off old folks.

The recipe is beastly long so I will just post the link to Joy's page where she has step by step instructions for ya.

Apple Pie:

Joy's Apple Pie <Click!


And last but certainly not least, the beautiful, sultry, rich and dreamy chocolate ganache tart with fresh berries and sweet cream.

Yes you heard me right. Chocolate....Berries.... Sweet Cream.... With.
This is not your average fruit tart. This has a dark side.
Creamy, dreamy dark chocolate is nestled in a toasted tart and topped with fluffy whipped cream and berries. UGH am I dreaming? This is all I need out of life, somebody hand me a spoon.

This was definitely the big hit at the party, everyone loved it and it was gone in no time.
However the ganache was really liquidy even at room temperature so once the tart crust was cool and I spread the ganache in it, I then covered the tart in plastic wrap and refrigerated it for a few hours before topping with whipped cream and berries and serving. Even though it didn't say anything about it in the recipe, it really helped it firm up to make it easier to serve.

Make this tart if you want to impress people because when you say you're bringing a chocolate ganache tart to a party everyone will think your soo faancyy.
When really, this baby is a cinch to make! You'll fool all those fools!
Also its just super fun to say ganache.
Ganache. 

Dark Chocolate Ganache Tart With Fresh Berries and Sweetened Cream

from: Joy the Baker cookbook


Ingredients:

Tart Crust:
1½ cups all purpose flour
½ cup powdered sugar
½ teaspoon salt
½ teaspoon ground cinnamon
Scant ⅛ teaspoon ground ginger
½ cup (1 stick) unsalted butter, cold
1 large egg yolk, beaten

Ganache:
8 ounces dark chocolate, finely chopped
1¼ cups heavy cream
¼ cup (½ stick) unsalted butter, at room temp. cut in half

Topping:
1 cup heavy cream
3 tablespoons powdered sugar
1 cup fresh raspberries
½  cup fresh blackberries, cut in half


Directions:

To make the tart crust: in a large bowl, combine flour, sugar, salt, and spices. Cut in butter with fingers until well incorporated. Some butter chunks will be the size of small pebbles, others will resemble oatmeal flakes. Once incorporated, add the egg yolk and bring mixture together with a fork. The mixture will be shaggy and crumbly. Dump the entire mixture into a tart pan with a removable bottom. Use your fingers to press the crust into the sides and on the bottom of the pan. Place tart crust in the freezer to chill for an hour. This is important; it will keep the tart crust from puffing up too much during baking.

While the tart shell chills, make the GANACHE; add chocolate pieces to a medium bowl. In a small saucepan over medium heat, bring the cream to a very low simmer. Pour half of the heated cream on top of the chocolate pieces and allow to rest for 1 minute. The chocolate will begin melting. With a whisk, begin to incorporate melted chocolate into the cream. Start by whisking the center, working your way out to carefully incorporate the cream and the melting chocolate. Slowly add the remaining cream and whisk carefully until smooth and glossy. Add the butter chunks and use spatula to stir until the butter is melted. The mixture should be dark and glossy. Set aside, at room temperature while the crust bakes.

Place a rack in the upper third of the oven and preheat to 350 degrees F. Butter a piece of foil and place, butter side down, on top of the chilled tart shell. Bake for 20 minutes. Remove buttered foil and bake for another 15 minutes, or until the tart shell is golden brown. Allow to cool completely before filling with GANACHE. 

To make the topping: in a medium bowl, whisk together cream and sugar until soft peaks form. Spread the chocolate ganache inside of the cooled tart shell. Top with fresh berries. In the center, generously dollop whipped cream. Serve immediately.

Best served the day made, will last well wrapped and refrigerated up to 3 days. 

...GANACHE.


 Oh and I also threw together a batch of mini coconut custard tarts just for funsies.
Recipe from Project Foodie


The dessert table! Brought a lot of smiles and full bellies. My favorite!

 Overall it was a lovely evening with fireworks across the river, and spending time with wonderful people who appreciate good food. Oh and we did appreciate the food very much. As I sit here in my fat pants typing this, my tummy is so full I can barely move. At least my fingers are getting a work out....