Sunday, March 17, 2013

Strawberry Banana and Nut Butter Muffins


Somebody better call the doctor....

Because I've got spring fever!!

Ahem..yeah..

WELL it's almost spring and that means warm weather! Fresh fruits and veggies are abundant and on sale at the grocery store! The flowers are in bloom! The air is fresh! And it's time to do some spring cleaning!
Spring is a time for wearing dresses and floppy hats and picking fresh fruits in the sunshine.
These are just some of my favorite things ever

I highly encourage you to celebrate the Spring Equinox on March 20th.
Years and years ago, people used to mark the change in seasons as a major holiday to celebrate. I feel like people today practically ignore the fact that the  world around them is changing, and instead we get caught up in silly holidays like St. Patrick's Day that really have no meaning. The equinox marks the beginning of a new astrological year and the length of the days and nights are equal...is this not something important to celebrate?!

So everyone should get your friends together and throw a barbeque, or go pick some berries, go for a bike ride, lay and watch the clouds pass by, or just do anything outside! We should take more notice of the Earth and it's changes as well as mother nature's beauty and celebrate something worthwhile.

On that note, I woke up today with a fridge full of berries that I got on sale at the grocery, and wanted to make something in anticipation of springtime!

I found this recipe for strawberry, banana, nut butter muffins and got to work!

Now, just a few notes about these muffins...I altered the original recipe and made a lot of substitutions, which may have either made the recipe better...or worse. So if you want to use the original recipe, click the link bro!

However! For the ground flax seed + water mixture, I did not have ground flax seed on hand so I used wheat germ, but I recommend using the ground flax seed instead

Also, it calls for 1/2 cup pecans which I didn't have on hand, so instead I used almonds chopped very fine, but I would omit them next time, they added strange consistency to the muffins, SO I recommend not using nuts, but hey, whatever floats your boat.


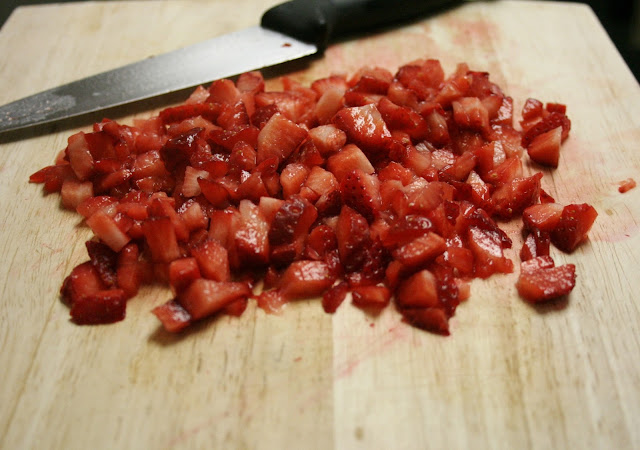
 These berries were so beautiful and bright, I felt bad cutting them up!

 But I did.


 A little springtime muffin


Strawberry, Banana, and Nut Butter Muffins


adapted from: ohsheglows

Ingredients:


1 cup whole wheat flour
3/4 cup unbleached white flour
1/4 teaspoon salt
1/2 teaspoon ground cinnamon
1/2 cup brown sugar
1/2 cup toasted almonds or pecans, chopped finely (optional, not recommended)
1 teaspoon baking soda
1/2 teaspoon aluminum-free baking powder
1.5 Tablespoon ground chia seed (or flax) + 1/4 cup water (I used wheat germ + water)
1.25 cup almond milk
2 Tablespoons butter
3 Tablespoons nut butter (I used sunflower seed butter. You can use almond butter, peanut butter, etc)
2 Tablespoons honey (or maple syrup)
1 large banana mashed, left a bit chunky
1 cup strawberries, chopped


Directions:

  1. Preheat oven to 375F.
  2. Grease a muffin tin and set aside.
  3. In a small bowl mix the ground chia or ground flax seed (in my case wheat germ...lame) and water and set aside.
  4. In a large bowl mix all dry ingredients: whole wheat flour, all purpose flour, salt, cinnamon, brown sugar, nuts (if using), baking soda, and baking powder. Set aside.
  5. In a medium sized bowl, mix all wet ingredients: chia/flax + water mixture, almond milk, warmed butter, nut butter, and honey. Mix well.
  6. Add wet ingredients to dry ingredients and stir.
  7. Fold in chopped strawberries, reserving 1/4 cup (I actually chopped up a few more berries to put on top in addition to the 1/4 of the ones I already chopped) to sprinkle on top of muffins.
  8. Scoop mixture into muffin tin and sprinkle on remaining strawberries.
  9. This recipe made 16 muffins for me and they baked for about 22 minutes at 375F. However many it makes for you, I would recommend rotating them after 10 minutes, and checking for doneness at 20 minutes, then adding any additional time if needed.



Wednesday, March 6, 2013

Mocha Hazelnut Marble Bundt Cake


 This cake is a mouthful to say, but a mouthful of wonderful to eat.
The hazelnut gives it such a nice texture and the nuttiness pairs so nicely with the mocha chocolate glaze.


You add melted chocolate mixed with coffee granules to part of the batter and swirl it in with the remainder of the white batter to create a lovely marbled effect.


 What a beautiful beast, nutty and warm out of the oven.


 And even if a chunk of it sticks to the pan like mine did, that's what glaze is for!
Chocolate fixes all your mistakes.
Life lesson, ya'll


Mocha Hazelnut Marble Cake 


from Joy The Baker adapted from Dorie Greenspan

Ingredients

2 1/4 cups all-purpose flour
1/2 cup toasted hazelnuts, finely ground
1 teaspoon baking powder
1 teaspoon salt
9 ounces unsalted butter, room temperature, divided use
3 ounces bittersweet chocolate, coarsely chopped
1/4 cup coffee (hot or cold)
1 teaspoon instant coffee, finely ground (or instant espresso powder)
1 3/4 cups sugar
4 eggs, room temperature
2 teaspoons vanilla extract
1 cup whole milk, room temperature

Directions

Center a rack in the oven and preheat the oven to 350 degrees F. Butter 12 cup Bundt pan, dust the inside with flour and tap out the excess.

Toast whole hazelnuts in a 350 degree F oven for about 12-15 minutes or until they are fragrant. Once cool, ground them until fine in my food processor. Be careful not to process them too much or they will turn into nut butter!

Whisk together the flour, ground hazelnuts, baking powder and salt in medium bowl.

Set a heatproof bowl over a saucepan of gently simmering water. Put 2 tablespoons of the butter, cut into 4 pieces, into the bowl, along with the chocolate, coffee and instant coffee. Heat the mixture, stirring often, until the butter and chocolate are melted and everything is smooth and creamy – keep the heat low so that the butter and chocolate don’t separate. Remove the bowl from the heat.

Working with a stand mixer, preferably with a paddle attachment, or with a hand mixer in a large bowl, beat the remaining 2 sticks butter and the sugar at medium speed for about 3 minutes – you’ll have a thick paste; this won’t be light and fluffy. Beat in the eggs one by one, beating well after each addition. The mixture should look smooth and satiny. Beat in the vanilla extract. Reduce the mixer speed to low and add the dry ingredients and the milk alternately, adding the dry mixture in 3 portions and the milk in 2 (begin and end with the dry ingredients).

Scrape a little less than half the batter into the bowl with the melted chocolate and, using a rubber spatula, stir to blend thoroughly.

If you want to go for the gingko pattern, scrape all of the white batter into the pan and top with the chocolate and marble it minimally. If you want a more marbled pattern, alternate spoonfuls of the light and dark batter in the pan. When all the batter is in the pan, swirl a table knife sparingly through the batter to marble them.

Bake for 65 to 70 minutes, or until a thin knife inserted deep into the center of the cake comes out clean. Transfer the Bundt pan to a rack and let cool for 10 minutes before unmolding, then cool the cake completely on the rack.


Mocha Sour Cream Glaze


Ingredients

5 ounces bittersweet chocolate, coarsely chopped
1/2 cup sour cream
1/4 cup light corn syrup
1/2 teaspoon vanilla extract
1/4 cup brewed coffee, at room temperature

Directions

Melt chocolate pieces in a heatproof bowl over a pan of simmering water, stirring occasionally until completely melted. Remove bowl from the double boiler.

Stir sour cream into the melted chocolate.

Add corn syrup and vanilla and continue to stir.

Slowly add the brewed coffee bit by bit, stirring to incorporate.

This will be a thick glaze. If you would like it much thinner, you can always add more corn syrup and coffee. This glaze will thicken slightly as it cools.

Spread onto the cooled Mocha Hazelnut Bundt Cake.

Sunday, February 17, 2013

Carrot Cake


Okay, so I'm about to make a claim. About a cake. And it's going to change the way you look at life. Maybe.

I think this is the best carrot cake ever. like everrrr.
I have witnessed lit up faces of pure joy and even heard the wonderful words "This is the best cake I've ever tasted"

This recipe is definitely a keeper, and one I will be making again.
I'm sorry but you gotta reevaluate your go-to carrot cake recipe and give this a whirl.
What sets it apart is the fact that you cook! the carrots and then puree! them before you put them in the cake! Whooahhh mind blown!

I would have never thought of that, but it makes the cake so incredibly moist and rich, it's like magic.
It's studded with walnuts that give it texture and counter the sweetness of the shredded coconut and crushed pineapple that are background flavors to the prominent carrot presence.

I loved sharing this cake with people. Everyone absolutely loved it and raved about it. It's always the best feeling when you do what you love and people really appreciate it.

This cake is reallyy big!!
But that's good because you're supposed to share it with a lot of people who will no doubt love it...and you.

Shout out to my Aunt Gesine for sharing this recipe with me! You're right it is THE BEST!

Carrot Cake

from: The Silver Palate Cookbook

Ingredients:

Butter, for greasing the pan
3 cups unbleached all-purpose flour
3 cups sugar
1 teaspoon salt
1 tablespoon baking soda
1 tablespoon ground cinnamon
1-1⁄2 cups corn oil (I used canola oil)
4 large eggs, lightly beaten
1 tablespoon vanilla extract
1-1/2 cups shelled walnuts, chopped
1-1/2 cups shredded coconut (I used unsweetened)
1-1/3 cups puréed cooked carrots
3/4 cup drained crushed pineapple
Cream Cheese Frosting (recipe follows)

Directions:

1. Preheat the oven to 350°F. Grease two 9-inch springform pans.
2. Sift the dry ingredients into a bowl. Add the oil, eggs, and vanilla. Beat well. Fold in the walnuts, coconut, carrots, and pineapple.
3. Pour the batter into the prepared pans. Set on the center rack of the oven and bake until the edges have pulled away from the sides and a cake tester inserted in the center comes out clean, 50 minutes.
4. Cool on a cake rack for 3 hours. Fill and frost the cake with the cream cheese frosting.

Cream Cheese Frosting

 Ingredients:

8 ounces cream cheese, at room temperature
6 tablespoons (3/4 stick) unsalted butter, at room temperature
3 cups confectioners' sugar
1 teaspoon vanilla extract
Juice of 1/2 lemon (optional)

Directions:

1. Cream together the cream cheese and butter in a mixing bowl.
2. Slowly sift in the confectioners' sugar and continue beating until fully incorporated. The mixture should be free of lumps.
3. Stir in the vanilla, and lemon juice if desired.
Frosting for a 2-layer cake

Saturday, February 16, 2013

Chocolate Cupcakes with Raspberry Buttercream


Valentine's Day is silly. Why do we need a day to tell someone we love them?
Spread the love every day people!!

I use Valentine's Day as an excuse to decorate everything in pink hearts and eat lots of chocolate.
Forever alone.


Cupcakes are a good way to show someone you care. On ANY day of the year!
And people LOVED these cupcakes. I made them for a bake sale and everyone who tried them raved about them. A perfect Valentine's treat!

Chocolate Cupcakes with Raspberry Buttercream

adapted from: Annie's Eats

Ingredients:

Cupcakes:
9 tbsp. unsweetened cocoa powder
1 1/2 cups cake flour
1/2 tsp. salt
1 tsp. baking soda
1/4 tsp. baking powder
8 tbsp. unsalted butter, at room temperature
1 1/2 cups granulated sugar
2 large eggs, at room temperature
1/2 cup strong coffee (or water)
1/2 cup whole or low-fat milk


Frosting:
16 tbsp. unsalted butter, at room temperature
6 cups powdered sugar
1/2 cup seedless raspberry jam
Pink icing color (optional)

Directions:

To make the cupcakes, preheat the oven to 350° F.  Line two cupcake pans with paper liners.  In a small bowl sift together the cocoa powder, cake flour, salt, baking soda, and baking powder.  In the bowl of a stand mixer fitted with the paddle attachment, cream the butter and sugar on medium-high speed until light and fluffy, about 5 minutes.  Mix in the eggs one at a time, scraping down the sides of the bowl between additions.

In a liquid measuring cup, combine the coffee (or water) and milk.  Add half of the dry ingredients to the mixer and mix on low speed just until incorporated.  Stir in the coffee(or water)-milk mixture and mix until combined.  Add in the remaining dry ingredients, again mixing just until incorporated.  Divide the batter evenly between the cupcake liners, filling the cups about 3/4 full.  Bake for 20 minutes, or until a toothpick inserted in the center comes out clean.  Transfer to a wire rack to cool completely.


To make the frosting, place the butter and jam in the bowl of a stand mixer fitted with the paddle attachment.  Cream on medium-high speed until well incorporated, about 2 minutes.  Sift in the powdered sugar and mix until smooth. 


Thursday, January 3, 2013

Homemade LÄRABAR


So after all the cookies, cakes, pudding, eggnog, hot chocolate, chocolate, candy, and everything else we vacuumed into our stomachs this holiday season, I think some healthy eating is definitely in order.

Instead of picking up another cookie, snack on something sweet yet packed with awesome ingredients like dried fruit and nuts!

I am trying to get back on track after all the Christmas sweets and these are a great little dessert substitute when you're craving sweets.

I occasionally buy LÄRABAR's for a snack between classes that gives me energy. They are literally made out of less than 5 ingredients. The ingredients list is: almonds, dates, dried fruit. They really are a great bar with no added preservatives or icky fillers.

That being said, I come to you with great news! Now you can make these bars in the comfort of your own home with three ingredients and about 10 minutes of your time. These are honestly the easiest thing I have ever made. And they're GREAT!

Save money. Make your own bars. Be awesome. Eat better!


Toast the almonds in a 350 degree oven for about 10 minutes, or until they become very fragrant. Watch them so they don't burn! Burnt nuts make for a not so cool homemade LÄRABAR. Trust me


Chop those nuts! Leave a few good chunkers in there if ya so desire


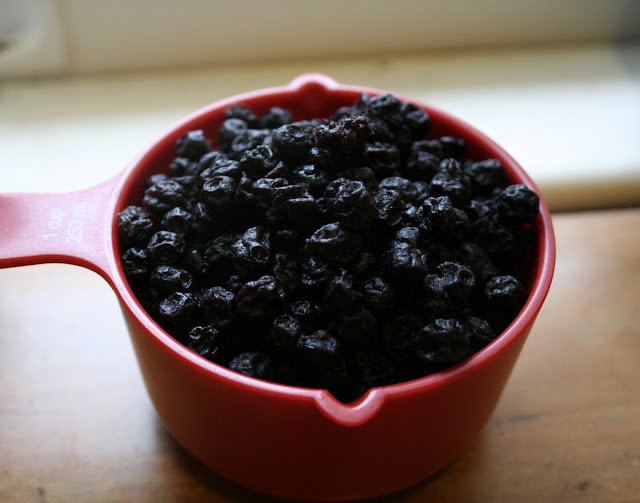
I used dried blueberries because I love LÄRABAR's blueberry muffin bar. But you can really use whatever dried fruit you want! Dried cherries, raisins, cranberries...


Now things get personal. Get your hands all up in this, and spread the nuts evenly throughout the mushy dried fruit.


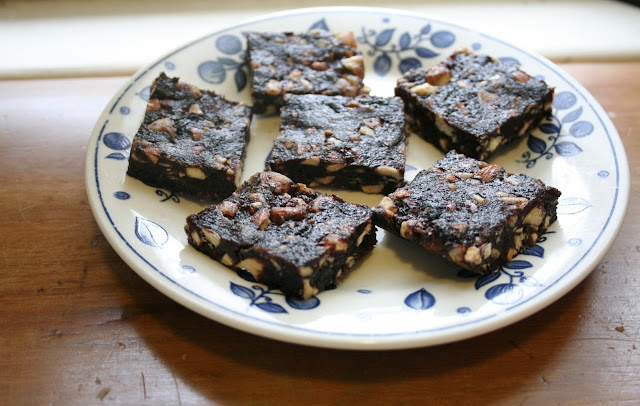
 Press down into a pan and put in the fridge! And that's all folks! Now enjoy being awesome and frugal with a delicious homemade LÄRABAR in your hand.


 Homemade LÄRABAR 

adapted from this recipe

Ingredients:

 1 1/4 cups medjool dates, pitted
1 1/4 cups dried blueberries (or any other dried fruit!)
1 1/2 cups almonds, toasted


Directions:

To toast the almonds, place them on a baking sheet and bake at 350°F for ten minutes. Remove from oven and transfer the almonds to a bowl or plate to cool.

Place dates and cherries in a food processor and pulse until a gooey semi-paste has formed (you want some bits of fruit, but not huge pieces). Empty the dried fruit into a large mixing bowl. Put the almonds in the food processor and pulse to coarse bits. You don’t want to make this a powder. Empty the almonds into the mixing bowl with the dried fruit. Knead the dried fruit and almonds together until combined and evenly distributed.

 Press the mixture into the bottom of an 8-inch or 9-inch square pan to about 1/2-inch thickness. Refrigerate the mixture for 30 minutes. Invert the pan’s contents onto a cutting board and slice to desired size.